
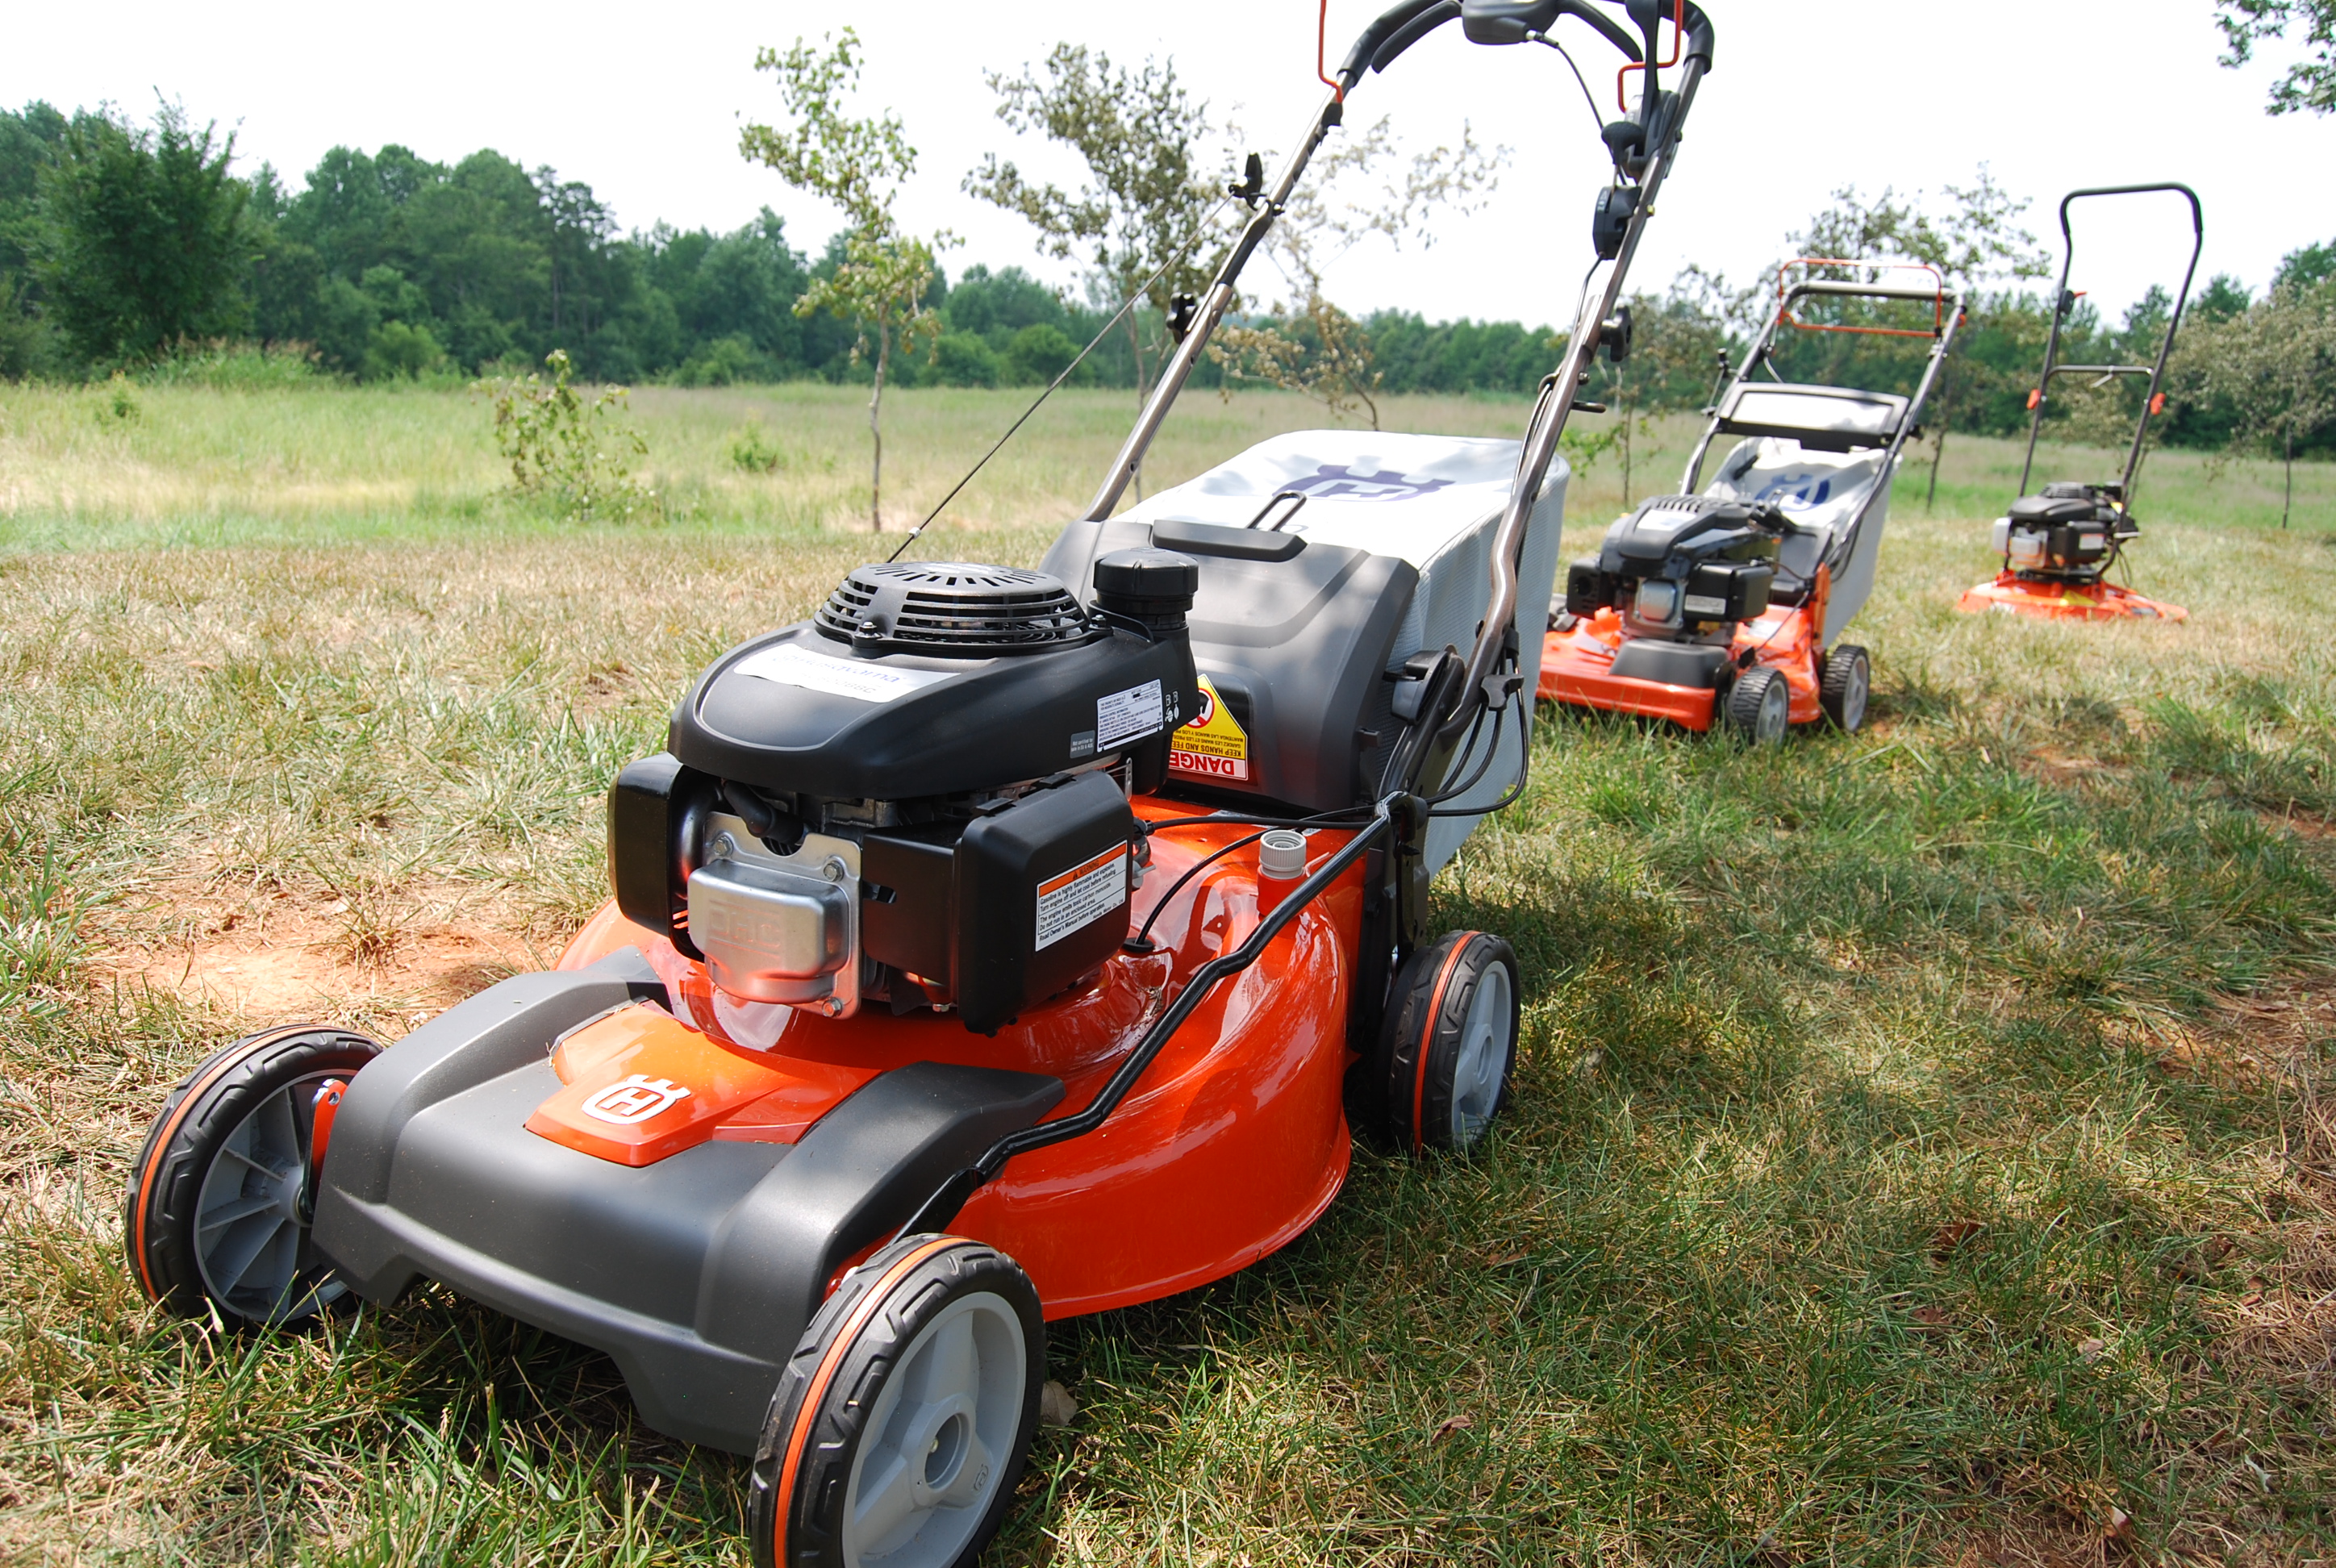
The proper maintenance for your lawn mower not only will ensure the durability of the equipment but also the reliability and cost efficiency.
A machine that is not working properly, represents operational downtime but also compromises the quality of the work you are doing and the amount of effort you put in to it. At the end of the day efficiency is the biggest reason for having the equipment.
Another key factor on the quality of your work is understanding the machine you use. There is no other activity than regular maintenance that requieres learning and understanding of the operation of the equipment.
It is recommended to do some maintenance at the end or beginning of the work to make sure the equipment will keep working properly. This is also a great time to see mistakes during the operation of the unit and make sure they don't happen again preventing malfunction due to improper operation which is one of the most common causes of failure, and the one no warranty agreement cover.
Here is a basis maintenance schedule common to most brands of lawn mowers:
Maintenance Schedule:
|
|
Every time |
Every 25 hours |
Every 50 Hours |
Every 100 Hours |
|
Inspect Mover blades for wear or damage |
√ |
|
|
|
|
Clean under the mowing housing |
√ |
|
|
|
|
Check and tighten blade and engine fasteners |
|
√ |
|
|
|
Clean the air filter |
|
√ |
|
|
|
Make sure the blade stops within 3 seconds after releasing the blade control |
|
|
√ |
|
|
Clean or replace spark plug |
|
|
√ |
|
|
Inspect your lawn mower v belt |
|
|
√ |
|
|
Replace or sharpened the blade |
|
|
√ |
|
|
Lubricate the wheels |
|
|
√ |
|
|
Change the engine oil |
|
|
√ |
|
|
Check fuel system for leaks: tank, hoses, connections and replace if needed. |
|
|
√ |
|
|
Clean the cooling system |
|
|
|
√ |
** For safety before doing any maintenance always remove the spark plug wire and secure it so it cannot re-attach by itself **
-- Always check with the operator manual the direction you can tilt the mower to avoid putting oil on your air filter or carburetor --
1. Inspect Mover blades for wear or damage: Look for damages on the blade like: bends, cracks, broken blades, if the worn on the blade makes it too thin and easy to break and make sure is sharp.
2. Clean under the mowing housing: Using a hard brush or a spatula clean under in the mowing housing. When done at the end of the day the cleaning will be much easier. Avoid using water for this since this will bring rust if is not properly dried and will take away lubrication from critical parts.
3. Check and tighten blade and engine fasteners: remember to check you spark plug is disconnected and the wire secured before you do this.
Your blade will always get loose turning to the left.
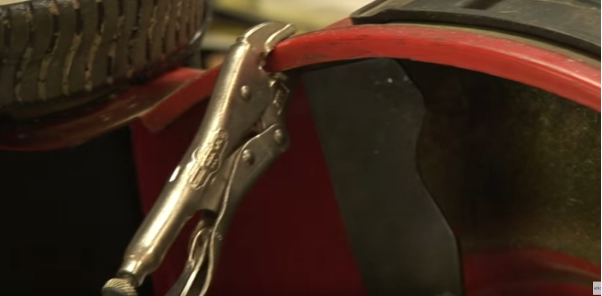
Install a vise-grip on one of the edges of the mower housing so that the blade can’t pass that point and with the help of a socket wrench tight the securing bolt. Engine fasteners are located under the mower inside the blade housing around the blade shaft.
4. Clean the air filter: Remove the air filter cover.
Paper filters: With the help of a brush remove the debris and blow compressed air to complete the cleaning. Never wash with water a paper filter.
Foam type filters: remove by hand the debris and complete the cleaning washing with soap and water. Make sure the dry completely the filter before installing.
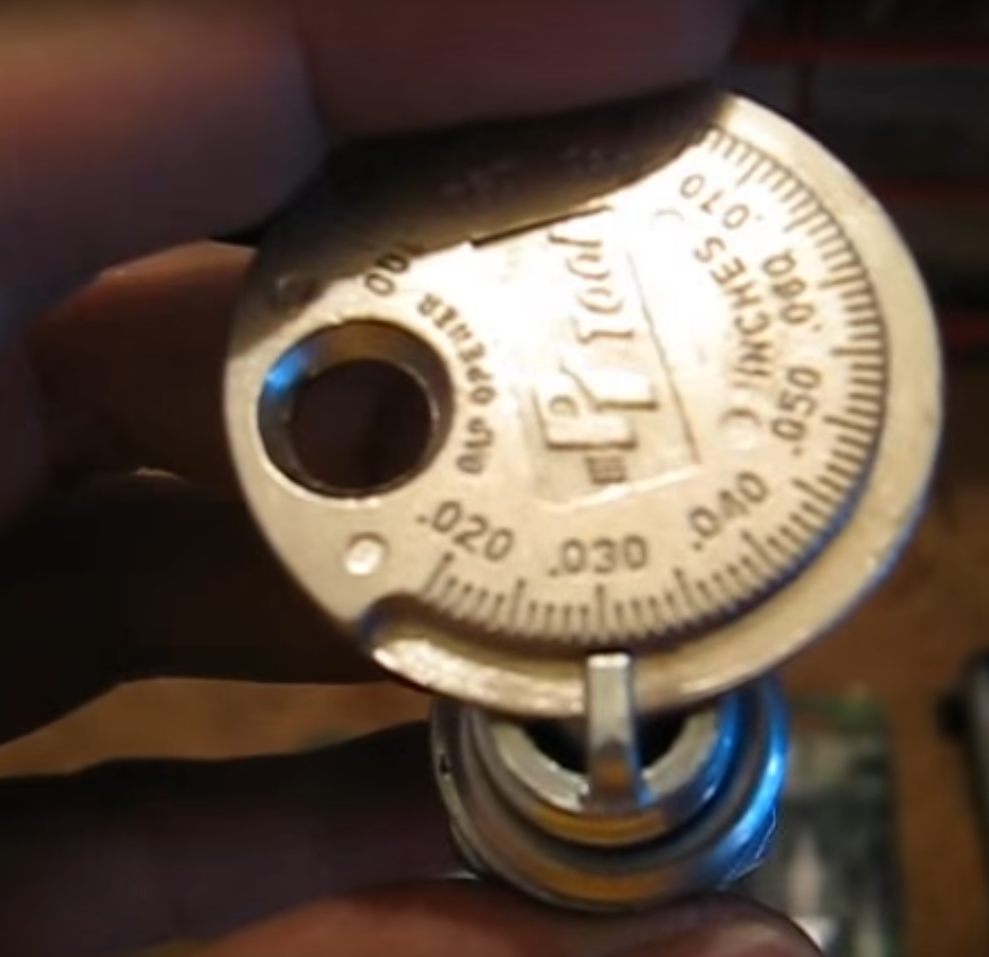
5. Clean or replace spark plug: remove the spark plug and with the help of a metal brush clean the electrode. Check with your owners manual the necessary spark-plug gap and with the help of a gapping tool adjust the electrode to the necessary gap opening or closing the electrode as necessary.
To make sure the gap is the correct you first close the electrode putting pressure with the gapping tool and your fingers(do not hammer the electrode) and then you adjust the opening with the gapping tool.
Coin type gapping tools are the most common and the ones that offer in most places.
6. Inspect your lawn mower v belt: Look for defects on the belt like shredded, abnormal wear on sections of the belt, check tension of the belt, check for cracks on the belt.
It is also important to make sure the belt drive don’t have radial movement otherwise this means they may need to be replaced.
Kevlar or Aramid belts are always the preferred type of belt to be used on mowers because of the extra resistance they have.
Cross reference belts in most of the cases will give you much better pricing and offer about the same durability.
The two key elements on selecting the proper belt for your mower is measuring the top width of the belt and the internal length of the belt.
7. Replace or sharpened the blade: Before you remove your blade make a mark so you remember the orientation of the blade. Install a vise-grip as explained previously to lock the blade and proceed to remove. Clamp the blade in a vise and using a grinder sharp the cutting edge keeping the same cutting angle as before until the blade is sharp.
When doing maintenance to your blades it is also important that you correct any bend on the blade.
As any rotating device, it is important to maintain the balance. Using blade that doesn’t have the proper balance will create extra wear to the blade shaft bearings.

Use a nail in a wall to hang the blade after sharpening to verify the balance. If you detect an unbalance to one side, you will need to remove more material from the edge on that side so you keep the balance of the blade.
One important think to always keep in mind when sharpening a blade: DON’T BE CREATIVE. Never change the original design of a blade by creating more sharp edges or strange shapes to “improve” the cutting
8. Lubricate the wheels: remove dust and dirt with a brush. Apply W40 to the wheel Bering and remove the excess with a cleaning rag.
9. Change the engine oil: verify with the owner’s manual the proper way to drain the oil out of the engine. Make sure to warm up the engine before to start for a couple minutes before proceeding so that the oil will drain easier.
10. Check fuel system for leaks: tank, hoses, connections and replace if needed: look for marks of spilled fuel on the fuel hoses, and fuel tank.
11. Clean the cooling system: remove the engine top plastic covers to expose the cooling system

With the help of a brush remove all the debris and dust. Once you finish add w40 to all rotating parts and remove the excess with a cleaning rag.
What else can I do to improve my mower reliability?
Once you have in place the proper schedule of maintenance it is important to keep track of it as mentioned. Keep with the owner’s manual of the lawn mower a couple blank pages of paper that will include the following information:
|
Date |
Hours of operation |
Total hours |
Daily maintenance |
Other maintenance |
|
|
|
|
|
|
Once you make of this a habit you will find that the investment of time you put will be significant lees than the time you will waste fixing last minute problems, overpaying for last minute parts and more important you will increase the durability of your equipment.
The other important thing to do is to keep in stock the consumables that your mower requires: blades, v-belts, filters and oil. One of the main reasons why people let their maintenance pass is because they don’t have the necessary parts, so make a habit of keeping at least one spare part and replace it as soon as you use it.
Buying your parts in advance will allow you to look for better prices and cheaper if not free shipping.
Be careful how you store your spare parts. Keep your filters away from dust, your belts stored in a fresh place and away from sunlight.
Your blades should be protected against air and is always good to add a little of W40 before storage to prevent corrosion.
Thank you for reading our article and we invite you to keep visiting our blog for new content.
Cheers!